SharePoint Server & Online Export Connector
Export scanned documents and associated metadata to Office 365 SharePoint Online or SharePoint Server
 With the introduction of SharePoint Online, starting your own SharePoint site has never been easier and affordable.
Microsoft offers Online SharePoint subscriptions and if you already have an Office 365 subscription for small business or for enterprises, you already have access to SharePoint online.
The Export Connector also supports on-premise SharePoint Server 2007, 2010, 2013, 2016 and 2019.
With the CaptureBites™ SharePoint Server & Online Export Connector, it is possible to scan batches of documents, automatically index them with bar codes or OCR and export the documents as TIFF, PDF, PDF/A or super compressed & searchable PDF to SharePoint Online or to on-premise SharePoint Server.
The connector is developed using the SharePoint web services API which allows to directly upload index documents to online SharePoint libraries and populate columns with index data.
The connector supports Subsites, Standard and Custom Content Types and Column mapping. Column Types can be text, choice list, date, amount etc.
Your content goes here. Edit or remove this text inline or in the module Content settings. You can also style every aspect of this content in the module Design settings and even apply custom CSS to this text in the module Advanced settings.
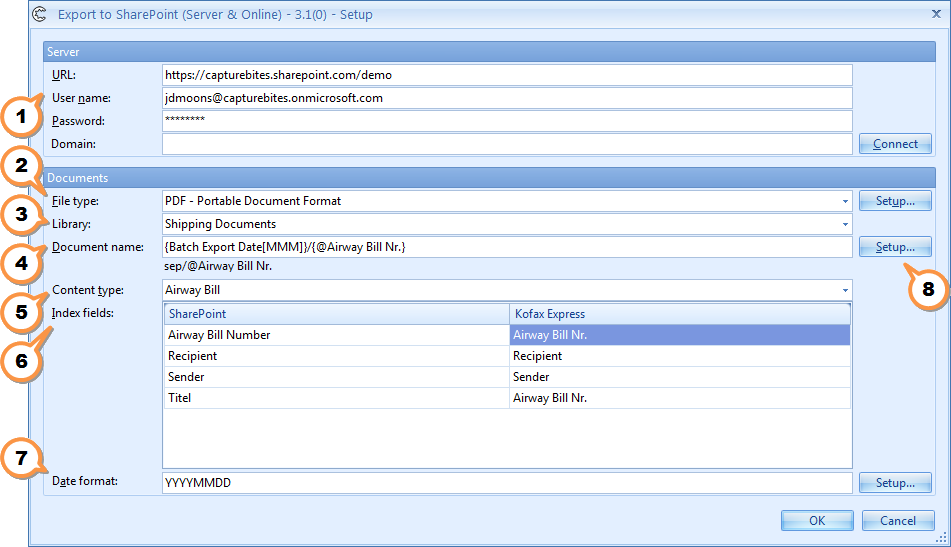
1To connect to SharePoint Online or Server, enter your SharePoint URL, user name and password.
If you want to access a Subsite, just enter the SharePoint URL followed by a slash and the Subsite(s) you want to use. In above example we will export to the demo Subsite of our CaptureBites SharePoint Online site.
Pressing Connect will retrieve all available Libraries accessible by the configured user. Columns available for the selected Content Type, are displayed in the Index Field mapping table.
2You can export your scanned documents as TIFF, PDF or PDF/A.
PDF formats can be configured as Searchable and/or Super Compressed, also known as PDF MRC (Mixed Raster Content). PDF MRC is a compression technique that reduces the size of color scans on average with a factor 10.
3All available Libraries are displayed in the Library drop down list. All scanned documents will be exported to the selected Library.
4The document name can be composed of system variables such as Export Date and Time and any of your custom defined Kofax Express Index values. By inserting slashes in the document name, you can dynamically create sub folders in the selected SharePoint Library.
5All Content Types available for the selected SharePoint library, are listed here. By default SharePoint provides a default “Document” Content Type. But any Custom Content Types are also available.

6As soon as you select a Content Type, all associated columns are retrieved and listed in the mapping table.
You can then map the SharePoint Columns with Kofax Express Index Fields.
You can also leave Columns unmapped, unless they are set as required in SharePoint. Supported Column Types are: text, choice list, date*, amount, currency and boolean.
7You can work with any Date format you desire in Kofax Express. Just define the Date format that you use in Kofax Express and the connector will convert it to the correct format expected by SharePoint.
8You can select any Kofax Express System Values or Index Fields from the Setup menu. Nothing to type, just pick and click to construct the folder & file name structure.
IMPORTANT – IN CASE OF AN “INVALID DATE” ERROR: SharePoint only accepts dates between 1/1/1900 and 12/3/8900. If a date is exported that is not between this range, the SharePoint Export Connector will fail with an invalid date error.
Work-arounds:
1. Put a date range check in your Date validation fields to avoid sending a date before 1/1/1900.
2. If you want to use dates before 1/1/1900, you’ll need to create a “Text” field instead of a “Date” field in your SharePoint library.
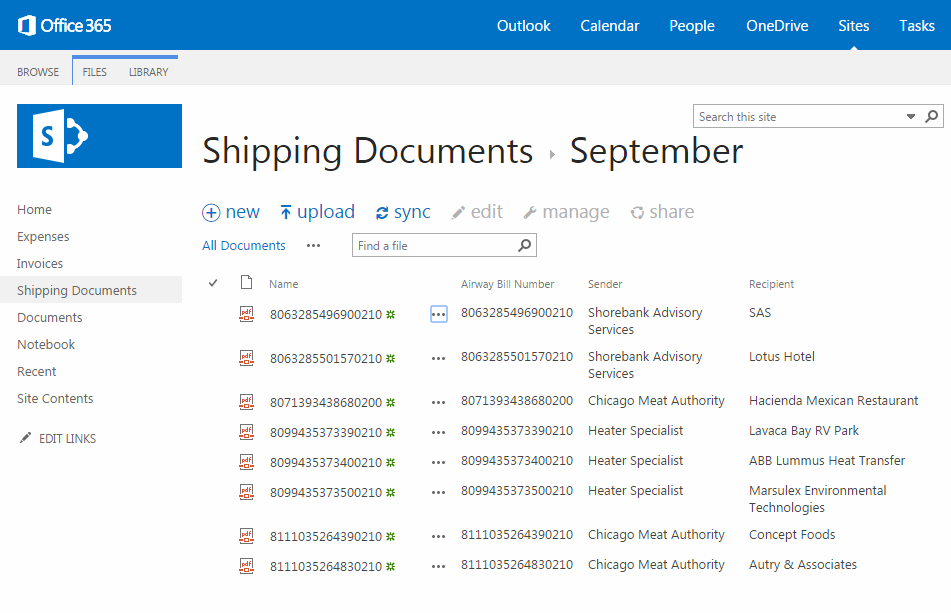
For our showcase, we made use of Office 365 SharePoint Online.
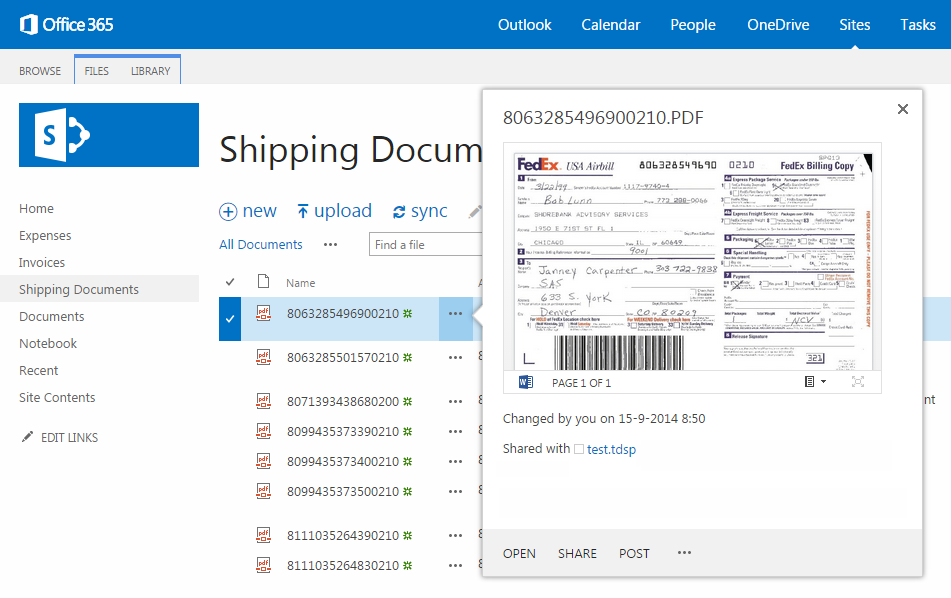
We scan airway bills with Kofax Express and use bar code reading to automatically enter the airway bill number. We also use database lookup to retrieve the sender and recipient. Using CaptureBites MetaTool you can even lookup data directly from SharePoint lists.
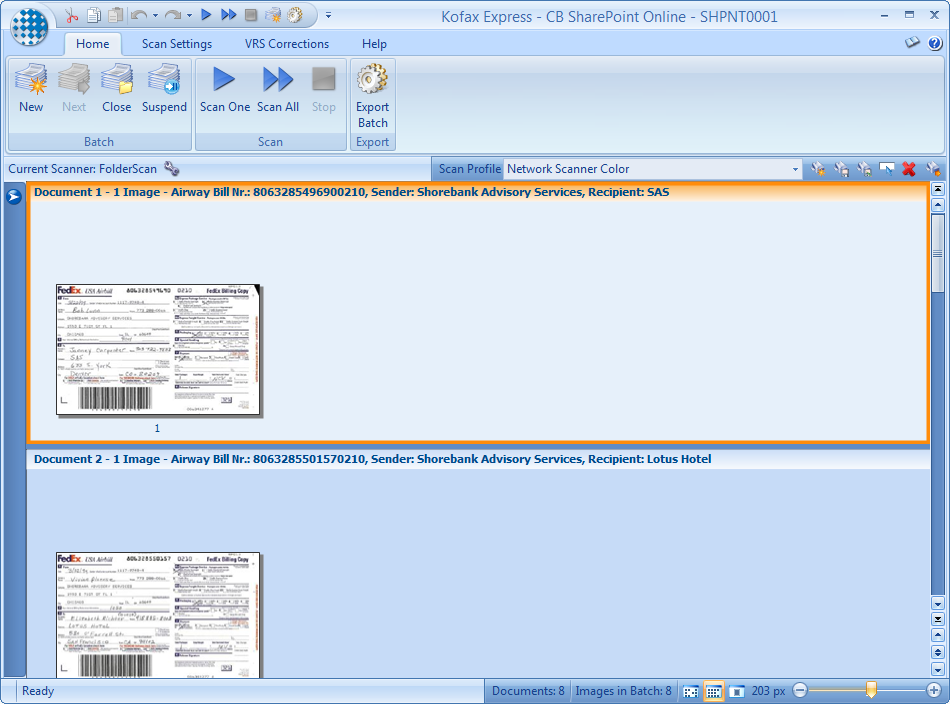
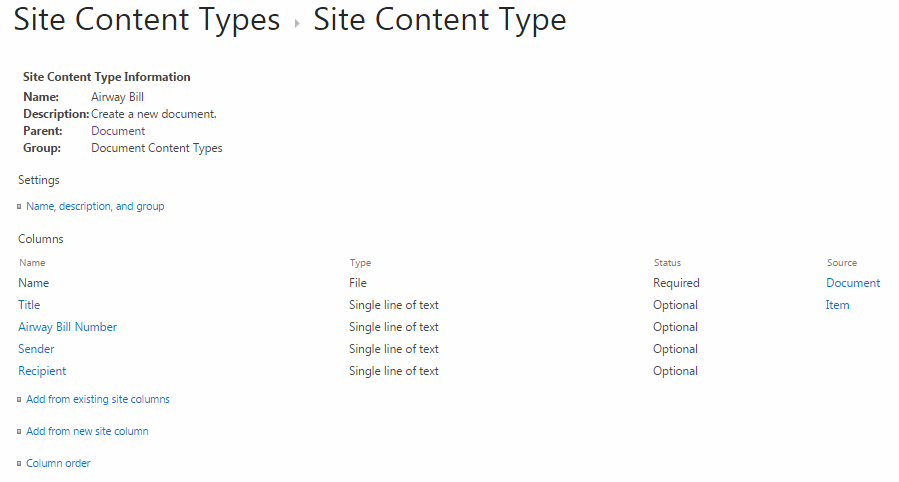
We already defined a Shipping Documents Library in SharePoint and also defined an “Airway Bill” Content Type with relevant Columns and correctly mapped the Kofax Express Index Fields in the CaptureBites SharePoint Export Connector setup (see setup screen on top of this web page).
Airway Bill Content Type Setup in SharePoint Online
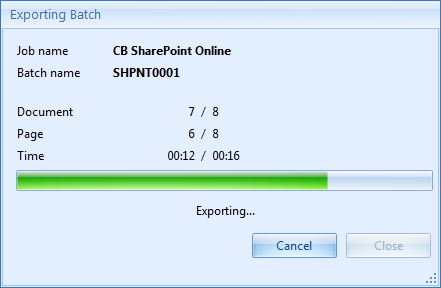
If the export would ever fail, you can find a log file describing the problem in:
C:\ProgramData\CaptureBites\Express\ExportConnectors\SharePoint\Log
We used a Kofax Express system value to automatically create a sub folder for today’s month (September). All Airway Bills are stored as searchable PDF files in the Shipping Documents Library and named according to their Airway Bill bar code number. Sender and Recipient columns are correctly updated.
Airway Bills can now easily be retrieved by means of SharePoint Search.
Combine this product with CaptureBites MetaTool for advanced index extraction and more
Use this product in combination with CaptureBites MetaTool for advanced index extraction, keyword document separation, floating data extraction, multi-field and drill down database lookup and other advanced functionality.
To learn more about MetaTool, press any of the feature buttons below.
The MetaTool presents itself as a standard Kofax Express export connector and passes through extracted data and processed images to an export destination of choice such as Email, Folder Structure, FTP Server, Database, MS SharePoint Server & Online, Alfresco, OpenText Content Server, Xerox DocuShare, or other DMS systems.
About the download and included demo jobs
The download button on top of this page installs a functional version of this CaptureBites product. It also includes some demo images and a demo job to show the functionality.
In demo mode, a demo seal will be stamped in all exported images. You can switch the demo version to full production mode by entering an activation code which you can purchase from our partners. You can continue using any of the jobs you configured in demo mode after activation of the software.
If you don't have Tungsten / Kofax Express yet, you can download a trial from here.

