MetaServer > Help > Add External Documents
140-030 MetaServer – Add External Documents
For example, you can process a check with MetaServer, extract the invoice numbers covered by the check and store them in a field called “Invoice List”.
Next, you use the Add External Documents action to append these invoices, that are already stored on disk and are named after their invoice number, to the check.
To output your edited PDF:
Step 1: Add the Add External Documents action just before the Export action(s) used to output your Processed PDF.
Step 2: In your Export action(s), select “Processed PDF” as the File source. More about that later.
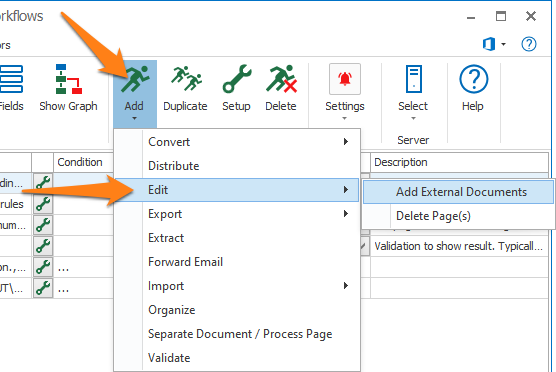
To add the Add External Documents action, select the action after which you want to insert the Add External Documents action and press Add -> Edit -> Add External Documents. The Setup window will automatically open.
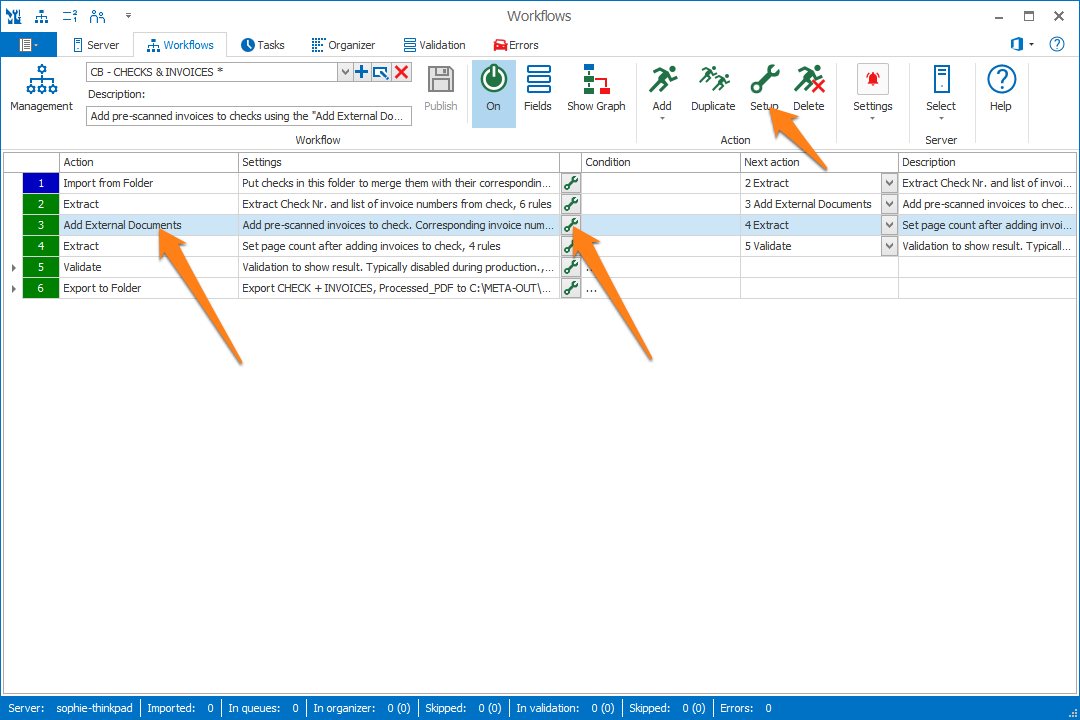
You can also open the setup window of an existing Add External Documents action by double clicking it or pressing the “…” button on the right side of the action, as shown below.
In our example, we will use the “CB – CHECKS & INVOICES” workflow as a reference. This workflow is automatically installed with CaptureBites MetaServer.
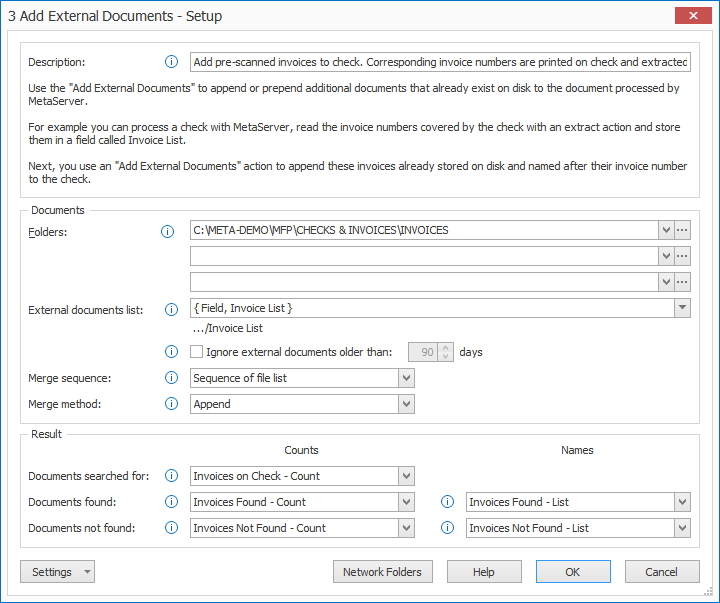
TIP: The thumbnail on the right will follow you, so you can easily refer to the Setup window. Click on the thumbnail to zoom in.
01 – Folders: MetaServer will look in the specified folders to find the external documents you want to add to the document processed by MetaServer. You can browse to a folder or specify a field holding the folder path value.
You can select up to 3 different folders.
NOTE: MetaServer will NOT look in subfolders of the selected folders.
02 – External documents list: select the field holding the file names of the external documents you want to add to your document. The file names should be separated with a line separator.
For example:
12345
45678
90123
MetaServer will look for these documents in the specified folders. So, taking this example list, it will try to find documents called “12345.PDF”, “45678.PDF” and “90123.PDF” in the specified folder(s) and add them to your document.
TIP: File names can contain “*” and “?” wildcards. For example, if you specify “INV*” as a file name, MetaServer will return any external documents with a file name starting with “INV”.
Ignore external documents older than [x] days: if a document is older than the specified number of days, you can ignore it.
For example, you are looking for invoices in a folder from the current year, and another folder for the previous year. In each folder, the invoices are just sequentially named and start at “00001.PDF” for every year.
If both folders contain invoices named “00001.PDF”, you want to skip invoices older than 1 year and only return recent invoices.
03 – Merge sequence: here you can choose in what order the external documents should be added to the current document.
1) Sequence of file list: add external documents in the sequence as specified in your External document list field.
2) Alphabetical: add external documents in alphabetical order.
04 – Merge method: you can add external documents after the last page of your document (Append) or before the first page of your document (Prepend).
05 – Network Folder: if you want to add external documents from a network folder, you need to define this in the Network Folder setup. For a more detailed guide on Network Folders, please refer to our Network Folder online help guide.
06 – Documents searched for: specify a field to hold the total document count of the “External document list” field.
07 – Documents found: specify a field to hold the total document count of all the documents found in the specified folder(s).
Names: specify a field to hold the list of document file names found in the specified folders.
08 – Documents not found: specify a field to hold the total document count of the documents NOT found in the specified.
Names: specify a field to hold the list of document file names NOT found in the specified folders.
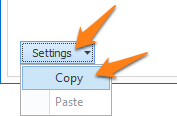
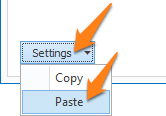
TIP: you can copy the current settings and paste them in another setup window of the same type. Do this by pressing the Settings button in the bottom left of the Setup window and by selecting Copy. Then open another setup window of the same type and select Paste.

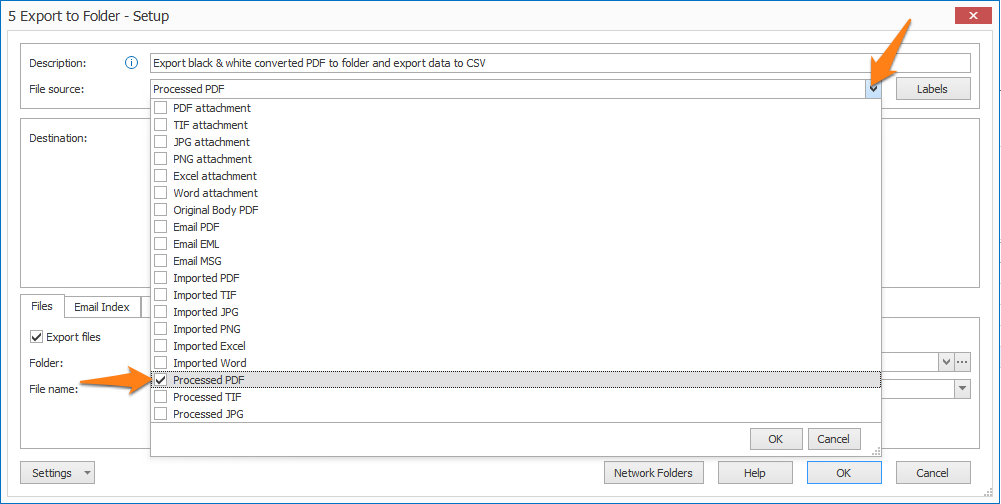
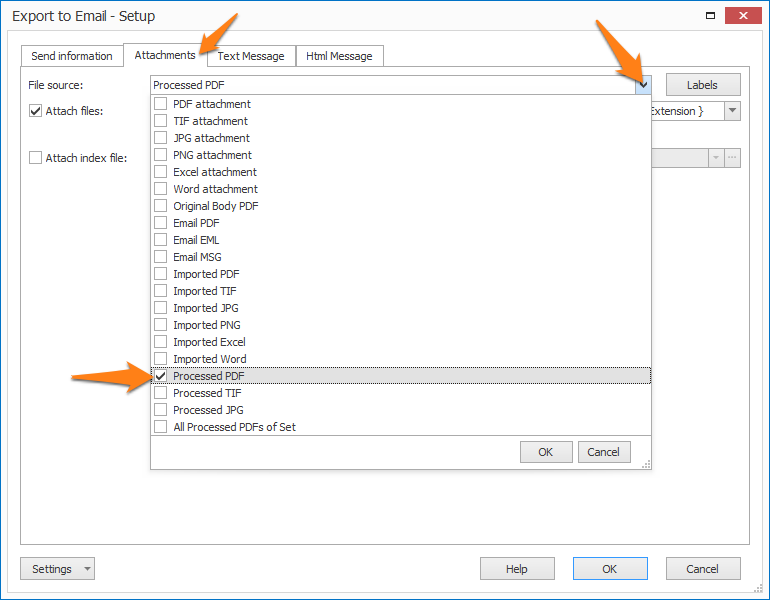
To export the edited documents, expand the File Source(s) list in your export action(s) and select “Processed PDF” or “Processed TIF”.
File source selection in Export to Folder
File source selection in Export to Email, if you want to attach the processed PDF to the email

