MetaServer > Help > Import Email
020-010 MetaServer Import – Import Email
MetaServer’s Import Email feature allows you to watch one or multiple email inboxes and detach, import and process PDF / TIF / JPG / Word* / Excel* / TXT* attachments from incoming e-mails. You can also watch folders and import .eml and .msg files instead of watching an email inbox through IMAP. You also have the option to archive the imported mail in a folder or subfolder of your mail-client or disk.
Each import action in a workflow can have a different next action. Consequently, you can process a PDF / TIF / JPG / Word* / Excel* / TXT* attachment differently depending on the watched inbox.
Example Case 1:
– A catering company receives incoming invoices through e-mail and on paper by post (snail mail). So, they watch an email inbox dedicated to incoming invoices and scan their physical invoices to a watched folder. MetaServer extracts all relevant data such as supplier name, invoice number, amount, due date etc. and uploads the data in QuickBooks for booking and payment.
Example Case 2:
– Insurance agents scan supporting insurance claim documents with their smartphone and the result is emailed as a PDF attachment to a central inbox to extract critical data and file the documentation in the correct claim folder.
*IMPORTANT: before you are able to import “Office Documents” (Word (DOC, DOCX, RTF)), Excel (XLS, XLSX) or TXT (TXT, CSV) files), you need to have a license for the “Import Office Documents” module.
If the module is not licensed and you enable the Word, Excel or TXT file type in an Import action, the importer will show an error in the Server tab as soon as it tries to import an Office document:
“Module ImportOfficeDocuments is not licensed.”
To avoid the error, disable the Word and Excel “File type” options from your Import Folder and Import Email actions or purchase a license of the “Import Office Document” module.
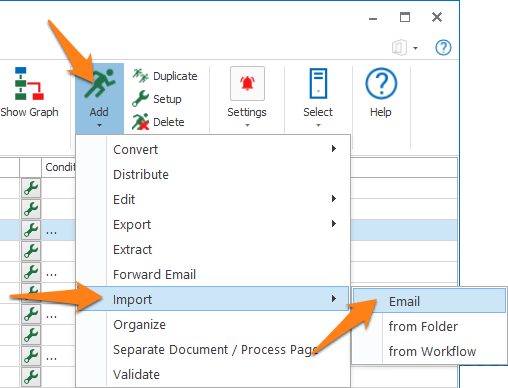
To add an Import Email action, select the action after which you want to insert the Import from Email action and press Add -> Import -> Email. The Setup window will automatically open.
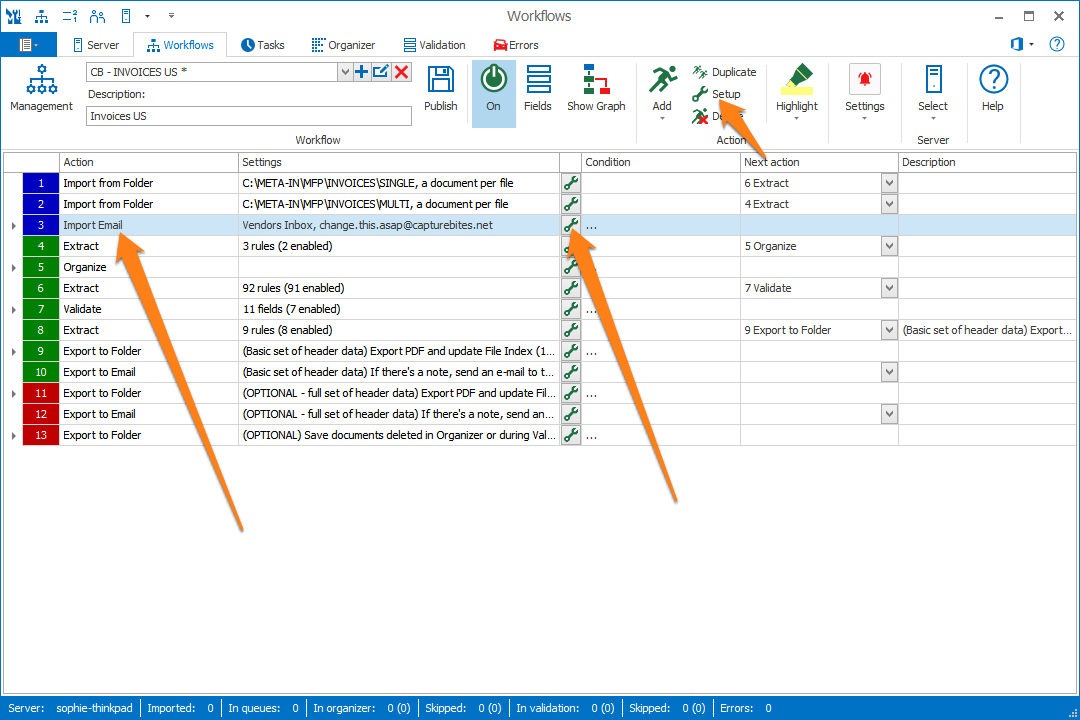
You can also open the setup window of an existing Import Email action by double clicking the action or by pressing the setup button on the right side of the action or in the ribbon, as shown below.
In our example, we will make use of the “CB – INVOICES US” workflow. This workflow is automatically installed with CaptureBites MetaServer.
TIP: The thumbnail on the right will follow you, so you can easily refer to the Setup window. Click on the thumbnail to zoom in.
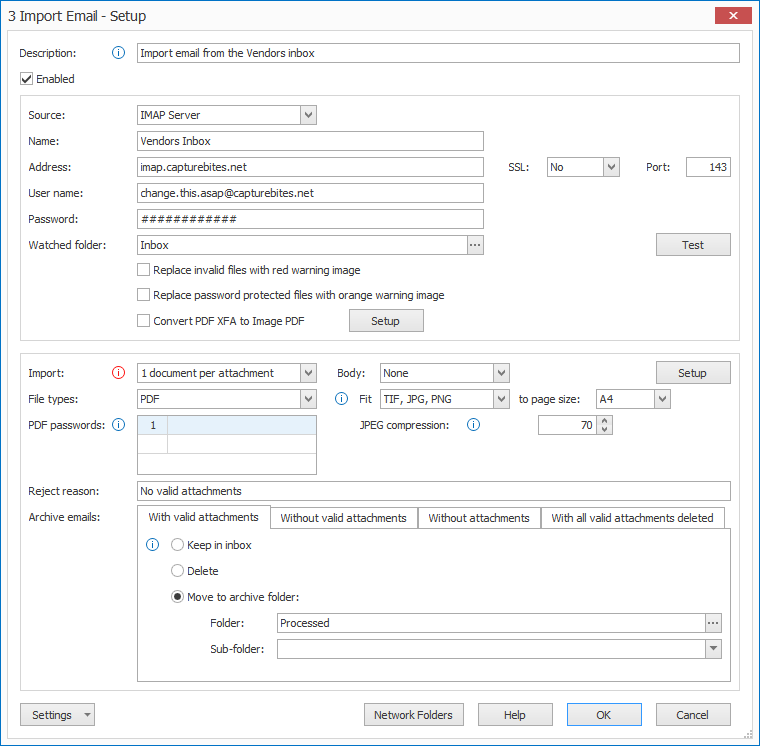
01 – Source: you can choose to import emails from the following sources:
Gmail: using Gmail as a source, you can watch a Gmail email inbox by logging in through OAUth20.
1) Sign in with Google: press the “sign in” button to grant MetaServer access to your Gmail account.
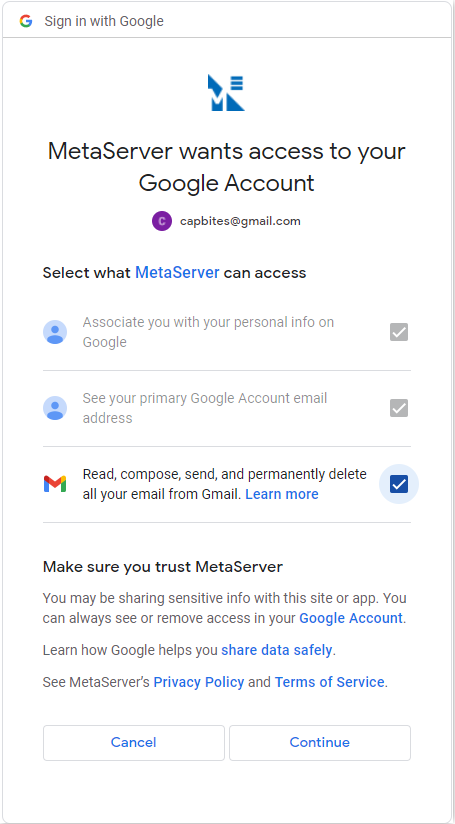
2) Watched folder: you can browse to your inbox (= watched folder) using the “…” button.
Office 365: using Office 365 as a source, you can watch an Office 365 email inbox by logging in through OAUth20.
1) Sign in: press the “sign in” button to grant MetaServer access to your Office 365 account.
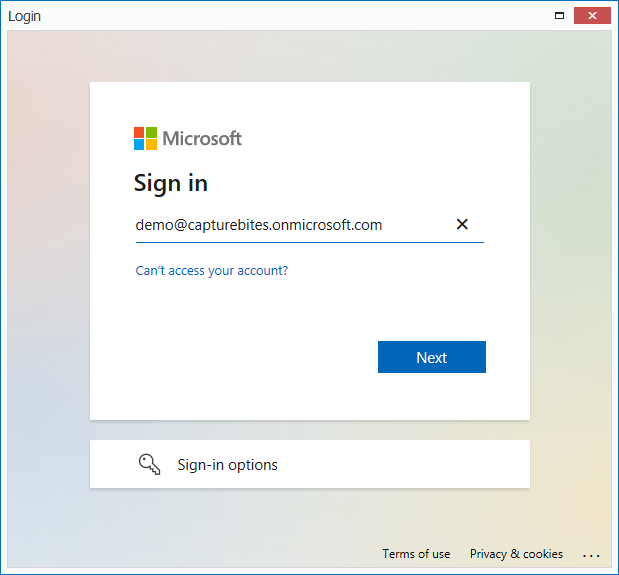
2) Watched folder: you can browse to your inbox (= watched folder) using the “…” button.
IMAP Server: replace the placeholder CaptureBites IMAP Server settings with your own IMAP Server details. The CaptureBites IMAP server is only meant for demo purposes, don’t forget to change this to your own IMAP server settings for the correct inbox when the workflow is used in production.
Your IMAP Server settings can be found through your email provider or you can find a range of popular IMAP settings here.
1) Name: enter a friendly name for your watched inbox.
2) Address: enter your email provider’s IMAP server address.
3) User name: the user name is the email address of the account holding the watched inbox. When in doubt, contact your IT department.
4) Password: enter your IMAP server password. This is the password you use to log into the watched inbox’s email system. When in doubt, contact your IT department.
5) SSL: SSL (secure socket layer) is a way of encrypting your email data as it travels across the internet. Check with your email provider if they require SSL and enable this option if they do. Gmail, for example, requires SSL.
6) Port: the IMAP Port is most often 993, but there are exceptions. Check with your email provider or, when in doubt, contact your IT department.
Disk: using the Disk as a source, you can import .eml and .msg files from a watched folder instead of watching an email inbox through IMAP.
1) Watched folder: you can browse to the watched folder using the “…” button or enter the path manually. Make sure this path already exists.
2) Import file [x] seconds after file creation: some MFP devices (we’ve experienced it with some MFPs from Konica-Minolta) write PDF files gradually in the destination folder and don’t always lock them while being written. This can generate a corrupt PDF file and cause errors. In that case, by setting a delay before importing the file with this setting, the MFP can correctly finish the PDF file.
3) Move file to: once a document is imported in MetaServer, you can choose to delete it from the watched folder or you can move it to another folder for archiving purposes.
4) Remove empty sub folders: disable this option if you don’t want to remove empty sub folders. This can be useful if, for example, the sub folder names in the watched folder hold the name of the person who scanned the document. The name can then be used in an Extract action’s Reserve rule to reserve the document for Validation by the person who scanned the document.
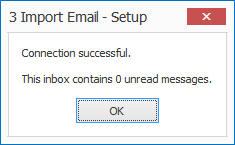
02 – Test: press the “Test” button to check your connection to the IMAP server. A pop-up will appear confirming that the connection is successful or not.
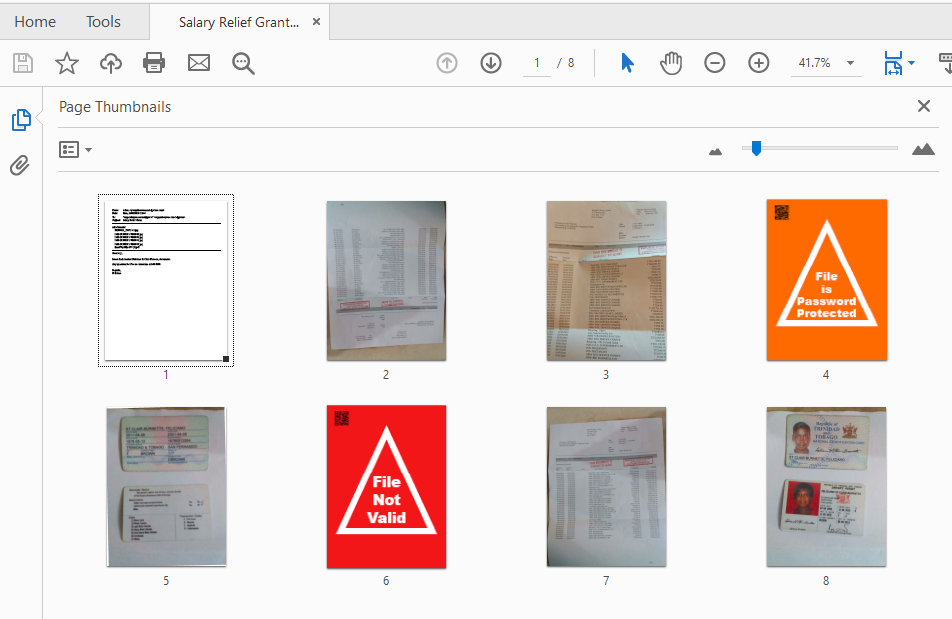
03 – Replace invalid files with red warning image: when enabled, invalid/corrupt files will be replaced with red warning images, including a QR code with the value “File Not Valid”.
This makes it visually clear that some attachments were corrupt. You can also use the QR code value to let the document go through a special exception flow.
This makes it visually clear that some attachments were password protected. You can also use the QR code value to let the document go through a special exception flow.
The final PDF will look like this:
05 – Convert PDF XFA to Image PDF: this option is enabled by default. PDF XFA is a legacy format that is not supported by Adobe anymore and was replaced by “ACROFORM”.
For archiving purposes, you still may need to process PDF XFA files, but they will cause a lot of problems because of their unsupported, complex format. To avoid these problems, this option automatically converts PDF XFA to an Image PDF.
You can press the Setup button to adjust the JPEG Compression of the Convert to Image PDF engine.
06 – Import: press the drop-down arrow to specify what part of the email you want to import.
1 document per attachment: this is the default mode. You can specify if you want to prepend or append the body in the body options (see Body options below).
Email body: this only imports the body of the email. It will convert it to a PDF and is handled as a regular PDF document in MetaServer. The attachments are ignored.
Email body and attachments: this merges all attachments in a single PDF and prepends (or appends) the email body, depending on the selected Body option.
Without the Apply Separation & Page Processing action, the Processed PDF format in the Export for Folder action would be the Email body and all its attachments as a single PDF. With an Apply Separation & Page Processing action, the email is split in a body and its attachments as separate PDFs.
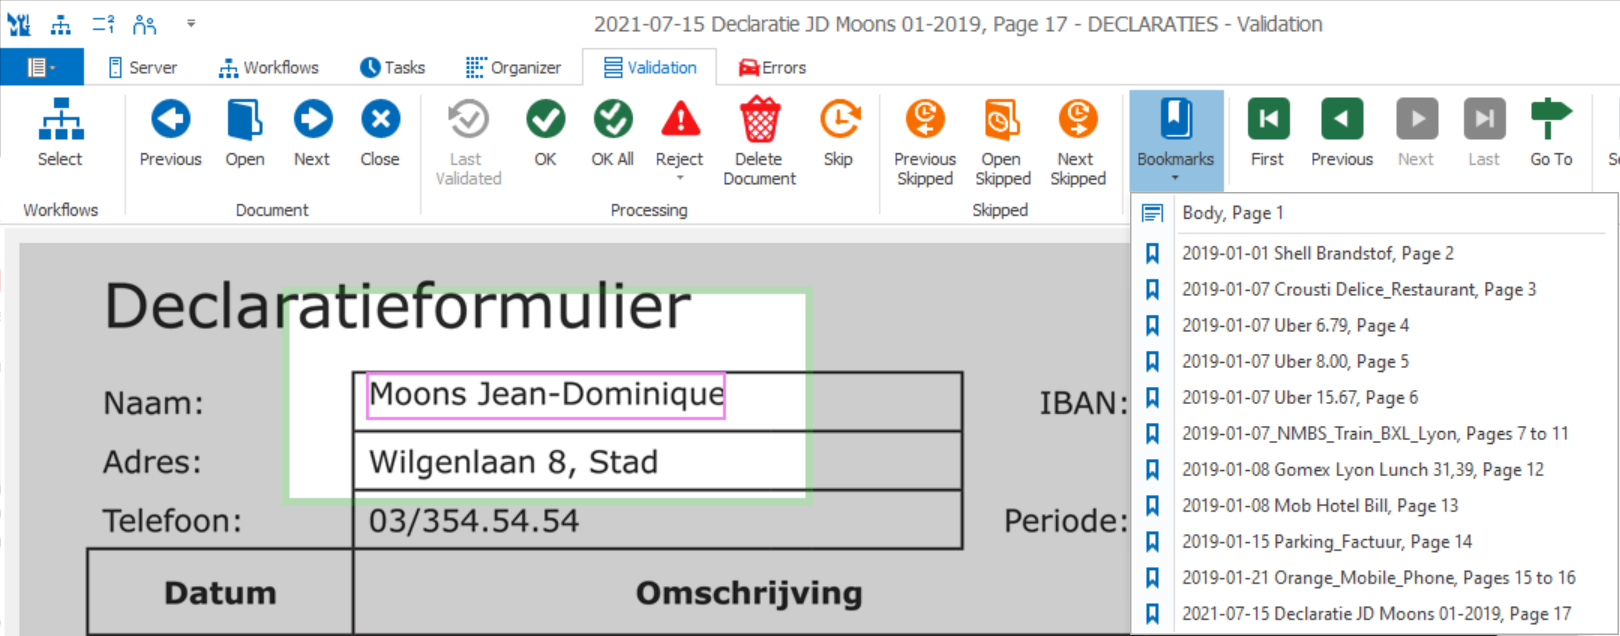
TIP: if you view a PDF with the “Email body and attachments” in Validation, the attachments can be selected from a “Bookmark” drop-down list. This way, the Operator can easily jump to each attachment and the email body.
NOTE: As soon as your document goes through an Apply Separation & Page Processing action, your document will be split in separate documents and your single PDF with bookmarks will be lost.
TIP: If you want to process your attachments differently than your email body, you need to add an Extract action after your Apply Separation & Page Processing action, add a Set Field Value rule and set a field to the “Document Source” value.
The values for the “Document Source” can be:
- Imported Document (= anything not imported through email)
- Attachment
- Email Body
You can then use that field to send your documents to separate actions with the Distribute action.
07 – Body: press the drop-down arrow to specify where the converted email body should be placed in your PDF.
None: The body is not imported.
Before attachments: Prepends the body.
After attachments: Appends the body.
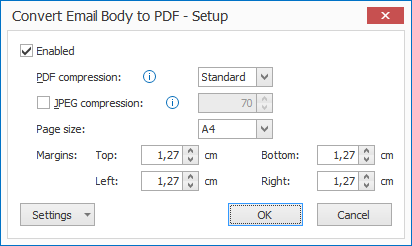
08 – Convert Email Body to PDF: Setup
If you want to keep your email body, press the Setup button to set up your Convert to Email Body to PDF settings.
1) PDF Compression: by default, Standard PDF compression is perfect for business documents containing a lot of text and some pictures. If most emails contain pictures that need to keep their original image quality, you can select Low or no PDF compression.
2) JPEG compression: enable this option to compress photographic images. A low value will generate a smaller file size but will decrease the image quality.
3) Page size: select your desired output page size. You can choose between A4, Letter or Legal size.
4) Margins: the margins change the distance of the body of the email relative to the borders of the PDF page. By default, a margin of 1,27 cm (0,5 inches) is applied.
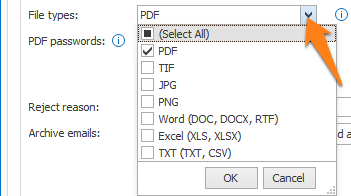
09 – File types: press the drop-down arrow to select the type(s) of the attached files. By default, PDF is selected. Right now, we support PDF, TIF, JPG, PNG, Word (DOC, DOCX, RTF)*, Excel (XLS, XLSX)* and TXT (TXT, CSV)* files.
NOTE: If your email includes ZIP or RAR attachments that contain PDF, TIF, JPG, PNG files, Word (DOC, DOCX, RTF)*, Excel (XLS, XLSX)* or TXT (TXT, CSV)* files, they will also be imported by MetaServer and automatically unzipped or unRARed.
A ZIP inside another ZIP will also be imported and unzipped. The same applies for RAR files.
*IMPORTANT: before you are able to import “Office Documents” (Word (DOC, DOCX, RTF)), Excel (XLS, XLSX) or TXT (TXT, CSV) files), you need to have a license for the “Import Office Documents” module.
If the module is not licensed and you enable the Word, Excel or TXT file type in an Import action, the importer will show an error in the Server tab as soon as it tries to import an Office document:
“Module ImportOfficeDocuments is not licensed.”
To avoid the error, disable the Word and Excel “File type” options from your Import Folder and Import Email actions or purchase a license of the “Import Office Document” module.
10 – PDF passwords: if you want to import password-protected PDFs, enter all possible passwords here. If none of the passwords work when importing a PDF, the document will be moved to the Errors tab.
IMPORTANT: In your export action(s), select “Imported PDF” to export the original version with password. Select “Processed PDF” to export a version without password.
11 – Fit JPG and PNG to page size: enable this option to reduce very large JPG or PNG files to A4 or Letter Size. Image quality is preserved, only the paper size is updated. JPG and PNG images with small dimensions such as receipts or business cards remain untouched.
For example, documents captured with a smart phone in JPG or PNG format often have incorrect, too large page dimensions causing data extraction and viewing problems.
12 – JPEG Compression: by default, the JPEG compression is set to 70. A higher value results in better image quality but larger files. The JPEG compression setting is used throughout the workflow every time an action needs to change a PDF.
IMPORTANT: Some actions, like the Convert to Multipage TIF action and Convert to Searchable PDF action (using the Tesseract engine), have their own Q-factor setting. This individual setting always takes precedent.
13 – Reject reason: you can overwrite the default reject reason with a custom reject reason. You can, for example, add instructions to what should happen to the rejected document. When an email is rejected, it’s a common use to send the document to an Export to Email action and add the Reject Reason field value to the body of the email, as seen in the example below.
14 – Archive: after e-mails are imported by MetaServer, you can archive them in different ways depending on their status. This can be done for emails with valid attachments, without valid attachments, without attachments and with all valid attachments deleted.
With valid attachments: the email contains one or more valid attachment and were successfully processed
Without valid attachments: the email does not contain any valid attachments. A valid attachment is any attachment selected in the File types setting in this setup.
For example: If you selected PDF and TIF as your File type and the system receives an email with *.XML and *.JSON files, then the email is considered as an email without valid attachments because none of the attachments were a PDF or a TIF file.
Without attachments: the email does not contain any attachments. Even without attachments, you can still archive the complete email with this option.
With all valid attachments deleted: an email gets a “deleted” status, if all its attachments are deleted in a prior Organize action or during Validation.
For example: You only selected PDF as your File type and the system receives an email with 5 PDF files. In the Organizer or Validation, the operator deletes 4 of the 5 PDF files. The Email will be archived “with valid attachments” because there still remains 1 valid attachment. Not all valid attachments were deleted.
On the other hand, if the operator deleted all 5 PDF files, then the email is considered “with all valid attachments deleted” because all valid attachments were deleted.
NOTE: If you enabled the Import option “Email body and attachments” and you delete all valid attachments but keep the body, then this email will also be considered “with all valid attachments deleted” .
For each of the 4 possible statuses you can define what happens with the original email:
1) Keep them in inbox: keeps the email in the inbox. It is marked as read so it won’t be imported by MetaServer anymore.
2) Delete: deletes the email from your inbox.
3) Move to archive folder: you can move the email to a folder or subfolder in your inbox for archiving purposes. If the folder doesn’t exist yet, it will be created automatically.
15 – Log: For troubleshooting, you can create a log file by enabling the “Log Email & FTP communication” option in your workflow’s Log dropdown list.
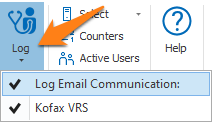
When enabled, the log files can be found here:
C:\ProgramData\CaptureBites\Programs\MetaServer\Data\Log
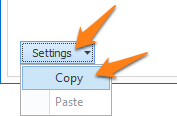
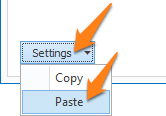
TIP: you can copy the current settings and paste them in another setup window of the same type. Do this by pressing the Settings button in the bottom left of the Setup window and by selecting Copy. Then open another setup window of the same type and select Paste.
