MetaServer > Help > Extract > Azure AI Summary
120-670 MetaServer Format – Azure AI Summarize
With MetaServer’s Azure AI Summary Format rule, you can automatically summarize a long text in just a few lines. This can be useful for summarizing the text in an email body or documents regarding complaints, customer requests, general correspondence or extensive project descriptions.
An “Azure AI Language Service” resource subscription is required for this module.
For example, this long article about Belgian fries (1240 lines)
https://www.visitflanders.com/en/discover-flanders/culinary-treats-and-belgian-beer/fries
is summarized in 4 sentences (40 words) as follows:
The article discusses the importance of fries in Belgium, highlighting that the country has over 4,600 fries stands across the country.
It clarifies that Belgian fries, also known as ‘French fries’, are made from bintje potatoes and are the best in the world.
The article also highlights the Flemish cuisine, which emphasizes authenticity and quality, and is known for using local, seasonal ingredients.
Some of the most popular dishes in Flanders include Vol-au-vent, a unique poultry fricassee dish, and Beef Stew, a popular dish served with fries
Azure AI Summarize rules are defined in a MetaServer Extract or Separate Document action.
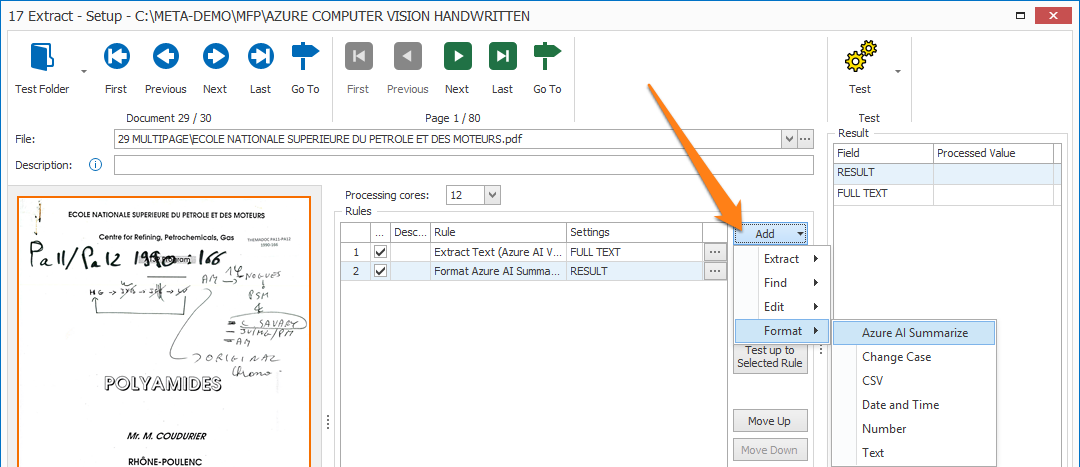
To add this rule, press the Add button and select Format -> Azure AI Summarize
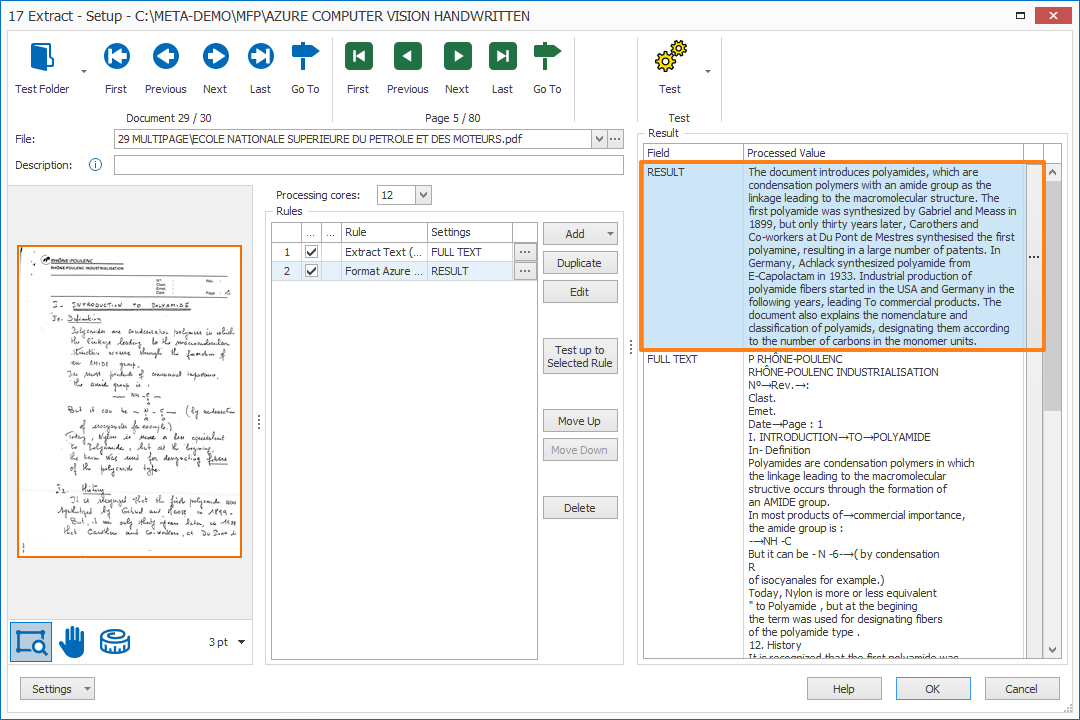
In our example, after extracting your raw text, you want to summarize the contents of French research papers in 4 lines of English text.
TIP: The thumbnail on the right will follow you, so you can easily refer to the Setup window. Click on the thumbnail to zoom in.
How to sign up for a key
NOTE: If you don’t have a Microsoft or Azure account yet, you can sign up for free. You can find more info here:
https://azure.microsoft.com/en-us/free/
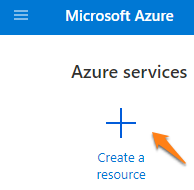
3) In the “AI + Machine Learning” section, create a “Language service” Resource:
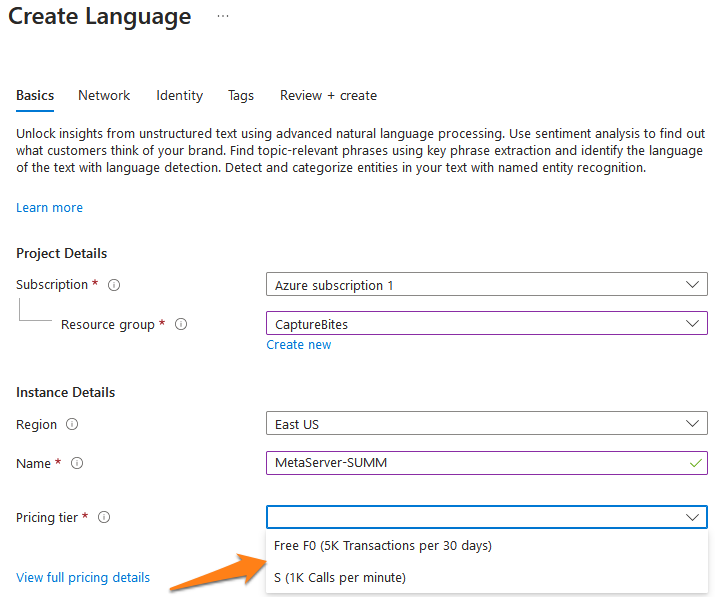
You can choose between 2 pricing tiers:
IMPORTANT: 1 text record = 1000 characters
F0 plan (Free): 5000 text records/month
– Every 28th of the month, the counter is reset to 5000 text records.
– When you run out of free calls before the 28th of the month, MetaServer will move documents to the Error tab and will report to wait until the 28th of the month to continue processing documents or to switch to a paid plan.
– Documents that ended up in the errors tab, can be reprocessed with a paid plan or retried when the free counter is reset on the 28th of the month.
– After the 12-month period, you will receive an email from Microsoft one month before the expiration, stating that the 12-month free service is about to expire and will stop working.
You will then need to switch from your free plan to a “pay-as-you-go” S plan (see below). You have 30 days to switch from your free plan to a “pay-as-you-go” S plan or to stop using the service.
The prices are available here:
https://azure.microsoft.com/en-us/pricing/details/cognitive-services/language-service/
S plan: Pay-as-you-go (> 5000 text records/month. $2, per 1000 text records for summarization)
– Speed of 1000 calls / minute.
– First 5000 text records / month are free of charge.
– For high volumes >10 M text records per month, please contact Microsoft Sales for special pricing here.
– You can pay the subscription with a credit card or request to pay by check or wire transfer here:
https://docs.microsoft.com/en-us/azure/cost-management-billing/manage/pay-by-invoice
6) You can find your resource’s Keys and Endpoint in your Microsoft Azure Dashboard. The “Go to Azure Portal” button will open the portal in your default browser.
The example below shows a resource called “MetaServer-SUMM”.
First, add a description to your rule.
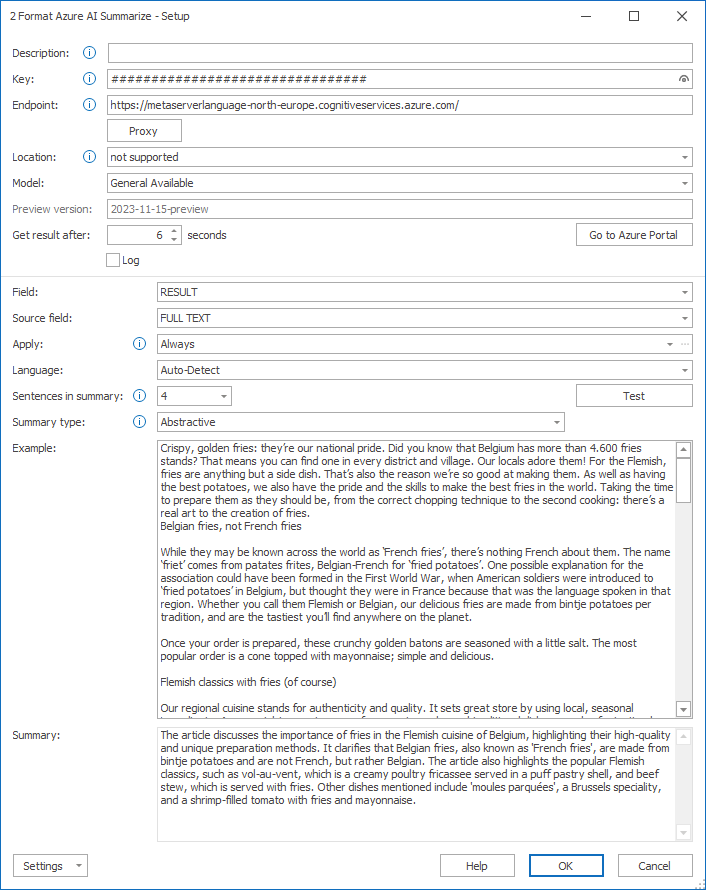
01 – Key, Endpoint, Location: enter your resource key, endpoint and select your location using the drop-down arrow. You can find this information in your Microsoft Azure Dashboard. The “Go to Azure Portal” button will open in the portal in your default browser.
The example below shows a resource called “MetaServer-SUMM”.
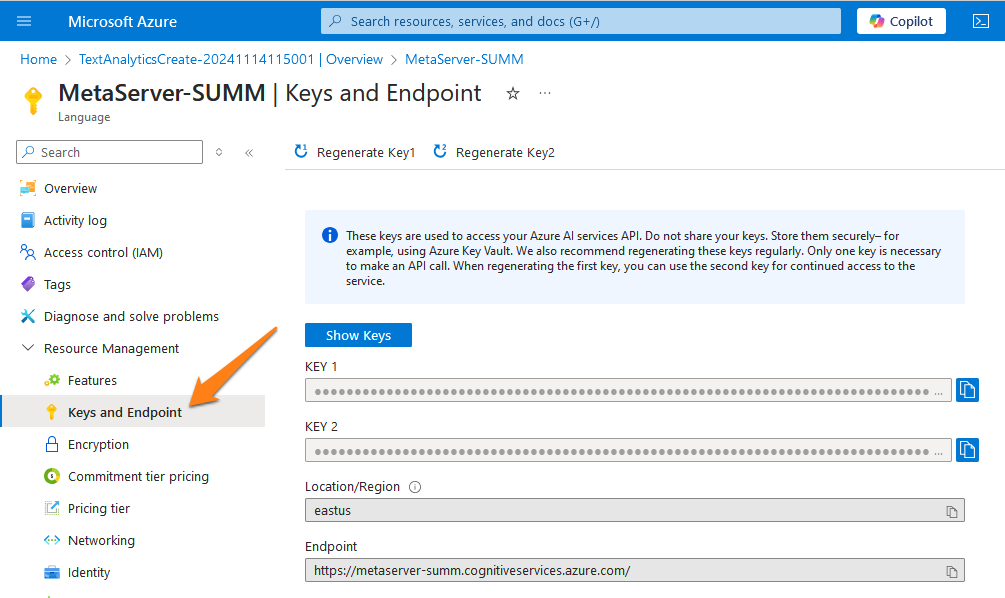
In your portal, you can also check your remaining calls. This can be useful to check if you’re not exceeding your current Microsoft Azure AI Vision’s pricing tier plan.
If you haven’t signed up for a key yet, please refer to the instructions above.
02 – Proxy: if you want to connect to a proxy server, press the Proxy button to open the setup window.

1) Type, Host, User name, Password: press the drop-down arrow to choose your proxy protocol and enter the connection settings to your proxy server. When in doubt, contact your IT department.
2) Port: enter the specified port of your Proxy server. When in doubt, contact your IT department.
03 – Model / Preview version: The “General Available” model uses the Azure AI Summarize’s official, general model.
If you select the “Preview” model, you can enter a specific preview model version. By default, this is set to preview version “2023-11-15-preview”. If you want to use another preview version, just enter the correct name of the preview model in the field.
Release info and preview model names are documented here:
https://learn.microsoft.com/en-us/azure/ai-services/language-service/whats-new
04 – Get result after [x] seconds: by default, this time is set to 6 seconds.
We currently only know the speed of Microsoft Azure AI Summarize’s paid plan. This is 17 calls / second (= 1000 calls / minute). Because of this, we recommend keeping the “Get result after [x] seconds” at 6 seconds.
05 – Log: enable this option to create a log file each time the Microsoft Azure AI Summarize engine is called. This option is typically used during diagnosing issues with Microsoft Azure.
On the client side, you can find the log information after running a Test in the setup in the following folder:
C:\ProgramData\CaptureBites\Programs\Admin\Data\Log
On the server side, after processing some documents, you can find the log information in the following folder:
C:\ProgramData\CaptureBites\Programs\MetaServer\Data\Log
06 – Field: select the field that will hold your summarized text. In our case, we select the field “RESULT”.
07 – Source field: select the field that holds the text that needs to be summarized. In our case, we select the field “FULL TEXT”.
08 – Apply: choose when to apply the rule. The default option is “Always”, which means that the rule is always applied. Press the drop-down arrow to see all other available conditions.
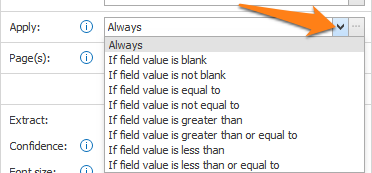
A good example of conditional summarization, is that you only want to summarize the complete text of a specific type of document, like an essay. Only then will you let the Azure AI Summarize rule format it.
This speeds up the formatting process and only uses calls to your Microsoft Azure AI Summarize resource when it’s required.
After selecting your condition, for example, “If field value is blank”, press the “…” button next to the drop-down arrow to open that condition’s setup window.

1) If value of field: press the drop-down arrow to select the field value that needs to be evaluated.
2) is equal to / is not equal to / is greater than /…: enter the other value your field value needs to be compared with. You can also press the drop-down button to select different system and index values to compose your value.

09 – Language: here you can specify the source and output language of your summarized text. By default, this is set to “Auto-Detect” which always outputs the summary in english.
You can find a list of all supported languages here:
https://learn.microsoft.com/en-us/azure/ai-services/language-service/summarization/language-support
10 – Sentences in summary: here you can specify the number of sentences your summary will contain. This can be max 20 sentences.
If the number of sentences choses is greater than the number of sentences in the original text, the output summary will just be the original text, verbatim.
11 – Summary type: here you can choose to generate an abstractive or extractive type of summary.
Abstractive: generate a summary with novel sentences.
Extractive: generates a summary using key sentences from the source text.
12 – Example / Summary: you can enter text here to test your current setup. Press the “Test” button to see the result in the “Summary” box.
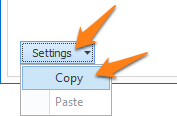
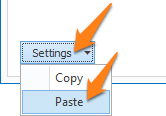
TIP: you can copy the current settings and paste them in another setup window of the same type. Do this by pressing the Settings button in the bottom left of the Setup window and by selecting Copy. Then open another setup window of the same type and select Paste.

In below example, after extracting 4 pages of full text from our essay with the Extract Text (Azure AI Vision) rule, we get the following summary:
The document introduces polyamides, which are condensation polymers with an amide group as the linkage leading to the macromolecular structure. The first polyamide was synthesized by Gabriel and Meass in 1899, but only thirty years later, Carothers and Co-workers at Du Pont de Mestres synthesised the first polyamine, resulting in a large number of patents. In Germany, Achlack synthesized polyamide from E-Capolactam in 1933. Industrial production of polyamide fibers started in the USA and Germany in the following years, leading To commercial products. The document also explains the nomenclature and classification of polyamids, designating them according to the number of carbons in the monomer units.

