MetaServer > Help > Export to Workflow
030-040 MetaServer Export – Export to Workflow
With the MetaServer Export to Workflow action, you can export documents to another workflow.
There can be multiple reasons to send documents from one workflow to another:
Example case 1: Two-Level Document Separation
You need two-level document separation if, for example, a PDF contains multiple patient records separated by a barcode sheet with patient ID. Inside each patient record, there are different sections each starting with a section sheet with a barcode with the section name (admission, surgery, pharmacy, etc.).
The first Patient Record ID workflow would separate by patient ID and export PDFs with an Export to Workflow action to the Section workflow.
The Section workflow would take over all metadata of the first workflow and perform another separation per section. The Section workflow would then do the final export to a folder structure per patient ID with inside a number of PDFs named according to the sections.
Example case 2: Multi-Format Output
If you want to output each document in multiple formats like, for example:
1) 300 DPI high resolution original image only color format
2) 300 DPI searchable black & white format
3) 100 DPI searchable scaled color format
You would use your first workflow to generate the high resolution, searchable color PDF. Then, before scaling it down to 100 DPI, export it to another workflow to convert it to black & white.
Example case 3: Document Classification
You can first classify the document per document type and then process each document type with its own set of extraction rules and fields.
The first workflow would be a classification workflow detecting document types by means of barcodes or by detecting keywords unique to each document type.
The classification workflow would then export to the correct workflow for each of the document type workflows.
If you want to export from one workflow to multiple workflows, you can add a Distribute action. This allows you to export to different workflows conditionally when you want to classify documents first with a classification workflow.
If you need assistance with the setup of connected workflows, feel free to contact us.
NOTE: When exporting to another workflow, it’s important to first add an Import from Workflow action to the receiving workflow. This acts as the entry point for Export to Workflow actions to that workflow.
To add an Export to Workflow action, select the action after which you want to insert the Export to Workflow action and press Add -> Export -> to Workflow. The Setup window will automatically open.
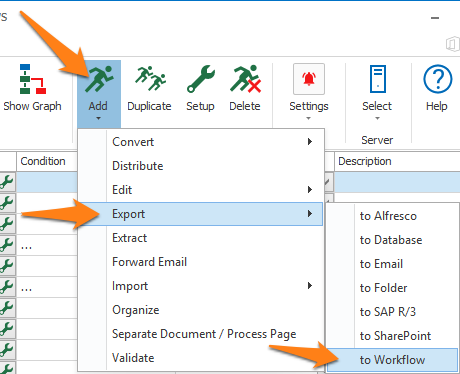
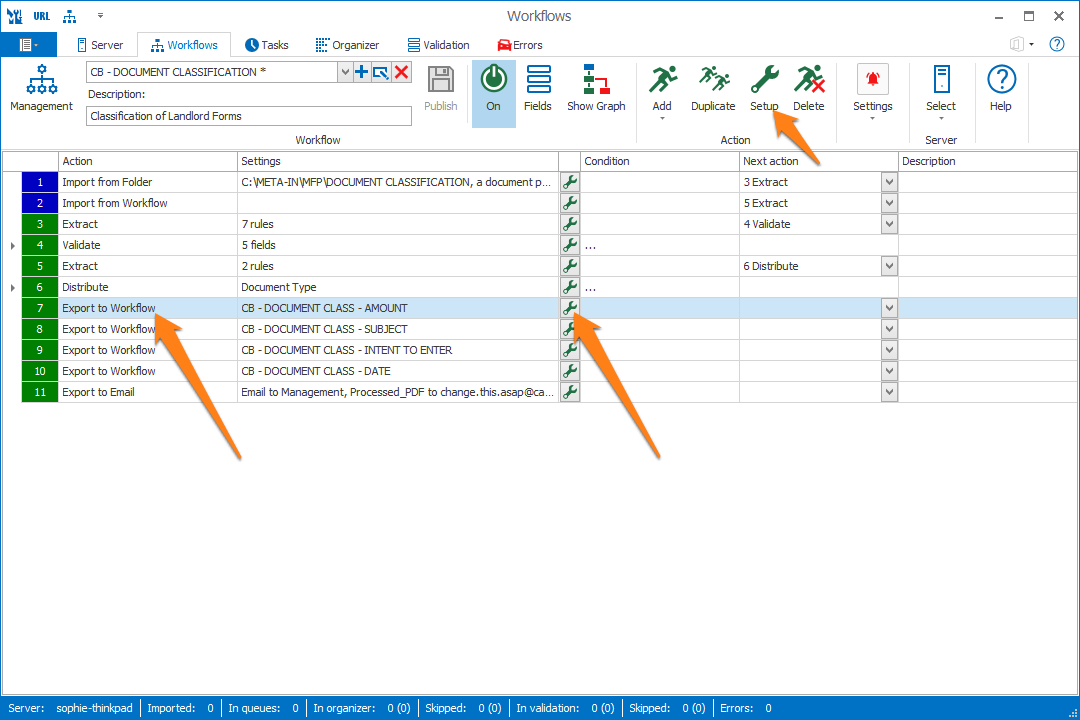
You can also open the setup window of an existing Export to Workflow action by double-clicking the action or by pressing the setup button on the right side of the action or in the ribbon, as shown below.
In our example, we will make use of the “CB – DOCUMENT CLASSIFICATION” workflow. This workflow is automatically installed with CaptureBites MetaServer.
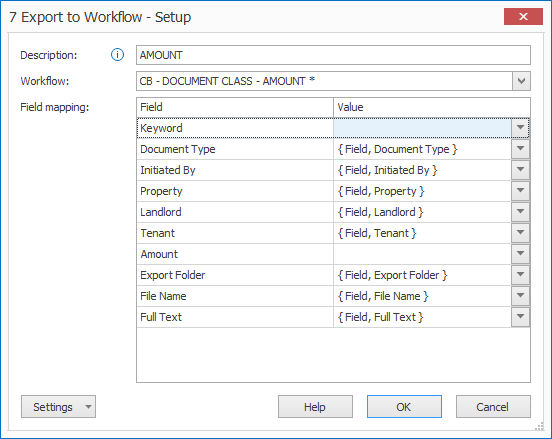
Don’t forget to add a description to your action.
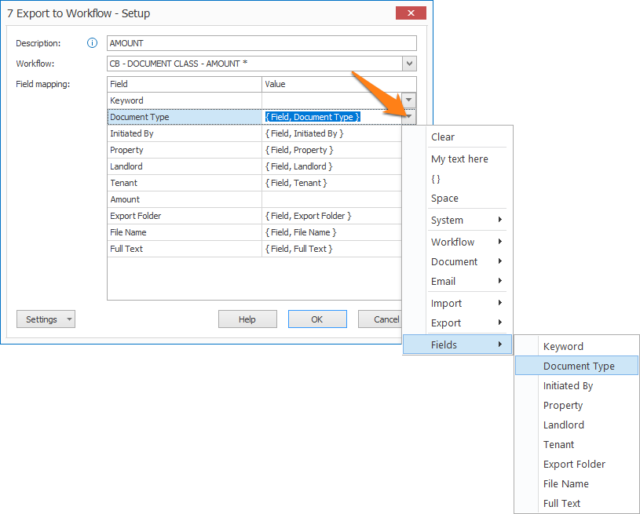
01 – Workflow: press the dropdown button to specify the receiving workflow. The “*” indicates if that workflow is currently active or not.
02 – Field mapping: here you can map your current workflow’s field values to the receiving workflow fields.
1) Field: this column shows all existing fields in the receiving workflow.
2) Value: in the value column, you can enter fixed values or use the drop-down arrow to compose the value using the current Workflow’s fields and metadata.
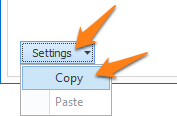
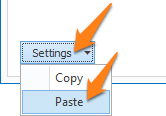
TIP: you can copy the current settings and paste it in another setup window of the same type. Do this by pressing the Settings button in the bottom left of the Setup window and by selecting Copy. Then open another setup window of the same type and select Paste.
