MetaServer > Help > Digital Imprinter
140-040 MetaServer Edit – Digital Imprinter
With MetaServer’s Digital Imprinter action, you can digitally imprint fixed text, field or metadata values or QR code on the first page, on all pages of your documents or on an additional blank header sheet, automatically prepended to each document.
IMPORTANT: The imprinted text is embedded in the document image and cannot be removed with a PDF editor as opposed to a text layer that easily can be removed with a text editor.
Original

After digitally imprinting a top banner and QR Code

To output your digitally imprinted PDF:
Step 1: Add the Digital Imprinter action just before the Export action(s) used to output your Processed PDF.
Step 2: In your Export action(s), select “Processed PDF” as the File source. More about that later.
To add the Digital Imprinter action, select the action after which you want to insert the Digital Imprinter action and press Add -> Edit -> Digital Imprinter. The Setup window will automatically open.

You can also open the setup window of an existing Digital Imprinter action by double clicking it or pressing the “…” button on the right side of the action, as shown below.


Don’t forget to add a description to your action.
01 – Page(s): specify if you want to imprint on the first or on all pages of your document.
To avoid printing on top of existing text, you can add a white (or other color) banner on top or the bottom of the page and then imprint inside that banner.
02 – Add top edge: enable this option to add a top banner to your image before imprinting your text. You can combine this with a bottom banner by enabling the “Add bottom edge” option (see below).
03 – Add bottom edge: enable this option to add a bottom banner to your image before imprinting your text. You can combine this with a top banner by enabling the “Add top edge” option (see above).

01 – Text: compose your string by combining fixed values, fields and metadata. Click on the drop-down arrow to pick from a list of possible values. You can see a preview of your file name below the input field.
02 – Location & Margins: here you specify the location of the text you want to imprint. You can further customize your location by setting the margins.
03 – Font: here you can choose your text’s font type, font size, font style and font color. You also have the option to add an outline to your text.

01 – QR Code Value: compose your string by combining fixed values, fields and metadata. Click on the drop-down arrow to pick from a list of possible values. You can see a preview of your file name below the input field.
02 – Location & Margins: here you specify the location of your QR Code. You can further customize your location by setting the margins.
03 – Size: here you can choose your QR Code’s size and color.
To see a preview of your setup, you can press the “Test” button in the setup which will open an imprinted test PDF file in your default PDF viewer.
If you are using MetaServer field values, press the “Test Values” button to set test values for a more accurate preview.

Test Values Window

Test Preview
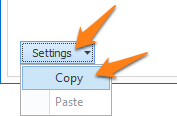
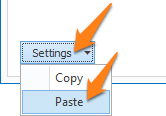
TIP: you can copy the current settings and paste it in another setup window of the same type. Do this by pressing the Settings button in the bottom left of the Setup window and by selecting Copy. Then open another setup window of the same type and select Paste.
To export the edited documents, expand the File Source(s) list in your export action(s) and select “Processed PDF”.

File source selection in Export to Folder
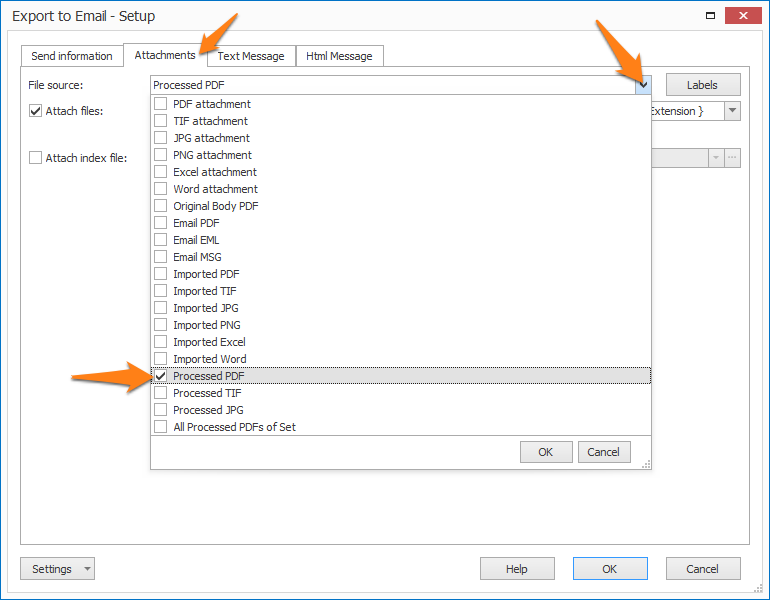
File source selection in Export to Email, if you want to attach the edited document to the email